HomeViewVR
-
AuthorPosts
-
2025-11-14 at 15:24 #17765
 RichOParticipant
Is there a way to upload panoramas to HomeViewVR w/o having to re-render the view every time? Alternatively, is there a way to download the panorama from HomeViewVR (so it can be used in other media)?
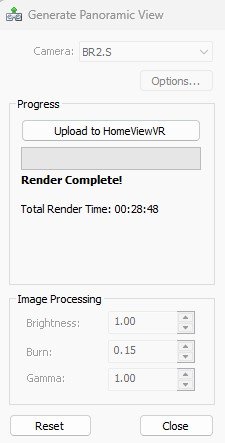
Currently, the only way to upload the panorama is to use the upload button after the render. The issue is that each render, using high fidelity settings, can take > 30 minutes each, and with >20 views, this can take at > 10 hours … babysitting the p|c (<span style=”color: #ff0000;”>please add batch processing</span>) … while the RAM is max’d out (preventing normal use of p|c for other uses). I have set the location as to where Envisioneer places the 6-cube images (used to create a panorama) into a famililar/local directory (via preferences). I then use 3DVista Stitcher to convert the 6-cube images into a panorama file. From here, the only option is to upload the panorama to the 3DVista site where it was hosted (30 day free trial). After this, must pay to host, as such, I’d rather upload the panorama’s I am interested in, into HomeViewVR.
I suppose worst case is that each view must be uploaded, then live with fact that the panorama file is only viewable on HomeViewVR, and not available for other uses/sharing.
<span style=”color: #ff0000;”>NOTE</span>: My goal is to create a virtual tour (currently using 3DVista) that allows the panoramas to be accessed via touring cues that allow user to move from room to room (Stitches panorama views into a single tour).
Thanks for help ahead of time. 🙂

 2025-11-27 at 13:31 #17776louisacoModerator
Hi, HomeViewVR requires a completed render before it will accept the panorama, so it isn’t possible to bypass that step. You can share the view externally.
Once you create the panoramic view in Envisioneer you would still upload it to the VR app and then from the app you would send out the 360 HTML link that you can share.
Here are the steps:
- In Envisioneer enter a 3D camera view>view>render panoramic view
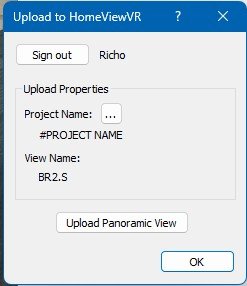
- When the render is complete, upload to your HomeViewVR app.
- Open the app on your device>go to my projects>select project>share
- Select the http:// icon at the top>enter your email address at the bottom of the screen>select blue arrow
- Open your email “app, HTML CODE SNIPPET…”
- Copy & paste this code snipped onto the HTML section of your webpage
- You can change the display size of the 360 by changing the default dimensions in the code snippet from 500 to what you want (full screen would be 100%)
2025-11-28 at 11:10 #17786RichOParticipantThanks. I was able to share the panorama – for viewing – via HomeView. That said, I still needed the combined panorama file (from 6-faced cube images) to create a tour (w/several panoramas). While HomeView allows sharing of the one view, I am not sure this link will work when creating a tour – but I’ll likely try the “link to HomeView” option file as well to see if that works within 3DVista to directly import the HomeView panorama file when creating a tour (several panoramas stitched together w/jump points).
I’ll let you know how that turns out.
Thanks again!
🙂
2025-11-28 at 11:29 #17787RichOParticipantI did try to import the HomeView (sample) into 3DVista (s/w that I use to create a virtual tour) w/o success.
2025-12-02 at 10:07 #17797louisacoModeratorThanks for the update, I can add this to the wish list for you.
2025-12-02 at 11:25 #17798RichOParticipantThanks, should help. 🙂
-
AuthorPosts
This website uses cookies to improve user experience. By continuing to use this site, you accept our use of cookies.