I would like to create a virtual walkthrough of my home designs, based on a series of “6 face” DLSR (3D) panorama room images. These images are generated by Envisioneer, but users CANNOT access the image file(s) produced and later uploaded (by Envisioneer) to the HomeViewVR cloud-port (for viewing only). As this option does not appear to exist in Envisioneer, my options are limited to: (A) either getting a new 3D modelling s/w, specifically one that DOES include this feature or; (B) get my Envisioneer Panorama views into a new s/w that will stitch the Panorama images together to form a virtual room-to-room walkthrough (blended path, or targets like on Zillow/Redfin virtual walk).
I wish Envisioneer had this capability, but I do not believe it does.
That said, combining the Panorama image option to the Envisioneer Animation function might work well.
Idea being that the nodes of animation path become linked to a series of Panorama cameras/views.
The cameras define the view. The animation path could also add targets (doors) that take viewer into different views (Hall, etc.)
Is there a way to access the “3D” DLSR image files produced by Envisioneer? If so how & where?
These are uploaded to HomeViewVR, but I want to import them into local stitching s/w to make walkthrough.
Note: The animation option is NOT the same, as it’s path, speed and focus are totally fixed.
Are there any opinions w/r/t which stitching s/w is preferable?
Examples: My360, CloudPano, Giraffe360, EyeSpy360, Kuula, or Virtual Tour Pro.
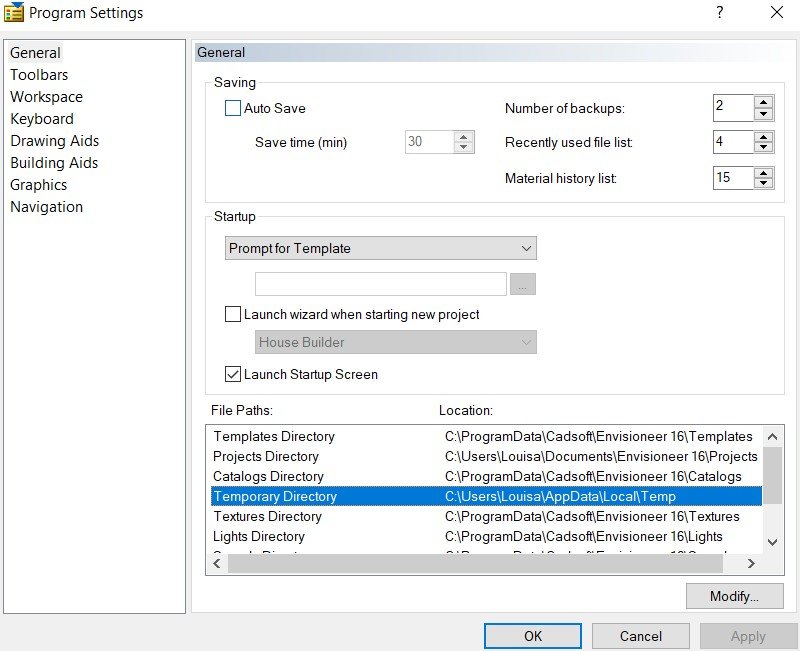
Shout out to CADSOFT’s Louisa Corion for solving how to access raw 3D 360 DSLR panorama image files prior to HomeView VR upload. The panorama image frames are actually saved locally on computer, in the Temp folder, before being uploaded to HomeViewVR.
C:\Users\YOUR NAME\AppData\Local\Temp … and will be named: Face0.jpg – Face5.jpg ……… I also highly recommend changing this location to one more easily accessed, such as in the user’s Envisioneer Project Folder. Once a new folder is created, open Envisioneer, open “Settings” menu, open “Program Settings”, and edit/update the “Temporary Directory” w/new folder location.
Author
Posts
Viewing 2 posts - 1 through 2 (of 2 total)
You have to log in or sign up in order to use our community forum.