Video: https://youtu.be/f8Q7kin7OYQ
Instructions from Video:
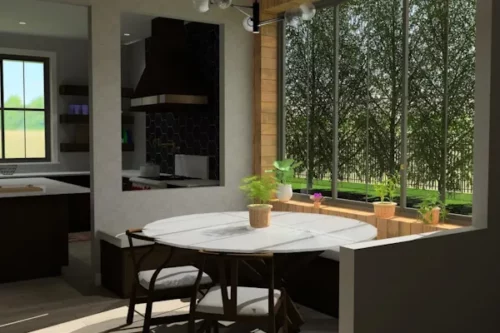
Creating renderings in Envisioneer is as easy as pressing a button, but some tips will help you achieve even higher end photorealistic images efficiently.
- Stripping the model down before rendering. This tip will speed up rendering views. Stripping the model down to just the room you are working in removes any geometry that won’t be seen in the rendered image. Select File>Save As. Give the new file a name and click Save. This saves a copy of the model under a new name. In the copied version of the model, we can remove elements that will not be in the scene to reduce the model size and, therefore, the time to render. By making a copy, we aren’t affecting the original. Left-click to select an item not visible in the room you will be rendering. Holding down the shift key on the keyboard, left click to select other items also not visible from that room. Holding down the Shift key allows you to select multiple items. Once all items are selected, right-click and select Delete. TIP: Make sure that you look in a 3D view to ensure you aren’t cutting something out in another room that is in the sightline of the room you are rendering. You want to ensure that items you can see through a window, or that are visible from your vantage point in the house, are still left in the model. For interior views, gutting out all exterior accessories, trees, and paths is a great way to cut down the file size. For exterior views, delete all furniture and accessories not seen through a window.
- Testing with Low-Quality Levels first. To get an understanding of the lighting and placement of elements before committing to the full high-quality rendering, set the quality level of the rendering to a low level to ensure the shadow lines work nicely before taking the extra time to render at the highest level and then find out something wasn’t quite as you wanted. Select View>Render 3D RealView. In the 3D RealView dialog box, select the Options button. In the Document Settings dialog box, set the Ray Trace Quality Level to Level 2 – Low (fast) and change the Anti-aliasing to 1 as the trial run for the rendering. These settings will render quickly, but the quality won’t be the greatest. For a trial, speed is more important.
- Use of Bump mapping. Elements are given textures so they appear like the actual elements they represent. Elements with grooves or imperfections, such as hardwood floors and brick, can use bump settings to simulate bumps and wrinkles by applying small surface displacements, making them look more realistic when rendered. Select Edit Material Paintbrush. In the catalog panel to the right, select the Stone Generic Group and the Last Chance stone material. Right-click and select Edit Material. The Materials Properties dialog box will appear. One of the options is Bump. Materials can either have a Bump Texture, which is an inverted copy of the original texture that highlights the high and low points of the texture, or you can set a Bump Scale to control the amount of bump mapping applied, and edit the Bump Scale value. A value of 0 means no bump mapping will be applied.
These tips will take your images up to the next level and save you time!